
To get going with SparqFest configuration, you will need to go to your SparqFest site and login. Everything happens in the Staff Portal which you can typically access via a link at the bottom of the public site home page. Some themes, however, may place this link in your profile menu. If it prompts you for an invitation code, then the user you logged in with does not have proper access to the Staff Portal. Contact SparqFest support to fix your access rights.
Step 1: Learn the Staff Portal Layout
The first time you access the Staff Portal, you will be brought to the SparqFest Staff Dashboard unless there is missing banking information. If you have not yet provided your banking information, a pop-up will prompt you for that information. You may safely dismiss this dialog without filling it out right now, but you will see the dialog every time you login until you provide the banking information. You cannot sell any tickets or accept any donations until your banking information has been sent to Stripe, our payments platform. We do not store any banking information ourselves.
Because there is not yet any activity associated with your festival, your dashboard will start off with no interesting data. Another document describes the data we collect and how to ready the festival dashboard. For now, just know that this is the start page for the Staff Portal and a great place to see the festival data at a glance.
The general menu on the left side of the page is divided into two groups:
- Edition-specific information (Dashboard, Submitting, Programming, Ticketing, Judging)
- General information (Classifications, Finance, Settings)
In general, you will see a sub-menu across the top for different subsections to each section. Also, once you create your second edition, you will have a menu in the upper right hand corner for switching between editions.
The Sections of the Staff Portal
This section briefly discusses the different sections accessed through the main menu of the Staff Portal. You can safely skip to the next section if you are anxious to start customizing SparqFest for your festival.
Dashboard
As mentioned above, the Dashboard is where you come to see how your festival is currently operating.
Submitting
The Submitting section manages the process of pulling data from a submissions platform like FilmFreeway and preparing those submissions for creator self-management in the Creator Portal.
Programming
The Programming section enables you to organize and program a given edition of your festival.
Ticketing
The Ticketing section is where you define tickets, what entitlements are associated with your tickets, and the pricing for those tickets.
Judging
The Judging section houses all functionality associated with configuring awards and handling both audience choice and juried voting.
Classifications
We currently help you organization selections by genre, theme, and perspective. The Classifications section enables you to define these different types of classification to suit your festival.
Finance
Finance is where you configure all of your financial information, such as banking information.
Settings
The Settings section is where you configure general settings and where we will spend the most time in this document.
Accessing Settings
New as of December 9, 2022: Many of the items formerly under “Festival” are now in a section called “Web Site”.
Once you get into the Staff Portal, you will want to go to access the Settings section in the main menu on the left. Because the Web Site subsection is the default subsection, clicking “Settings” will place you on the Web Site subscection.
As with most subsections in the Staff Portal, the Web Site subsection presents you with a list of tabs showing general areas of configuration. When interacting with these tabbed interfaces, you should specifically concern yourself with any tab label that is not in green with a checkmark. A tab turns green and gets a checkmark once you have provided all of the required information.
Configuration for your web site requires seven different groups of information:
- Basic Info
- Fonts
- Colors
- Images
- Theme Options
- Pages
- Dictionary
If any one of these subsections is not complete, you are not ready to invite creators or others into your SparqFest site. The only thing missing from the Web Site subsection is likely to be an abbreviation for your festival on the Basic Info tab. We'll return to web site configuration in a moment.
Step 2: Configure Email Communications
You probably want to jump right into customizing the look of your site, but we recommend you first review your communications settings. The communication settings define how all email communications are sent for your festival (invitations to creators and judges, receipts to audience members, etc).
To reach the communications settings, you will need to switch over to the three tabs of the “Festival” subsection. The communications settings are the last tab.
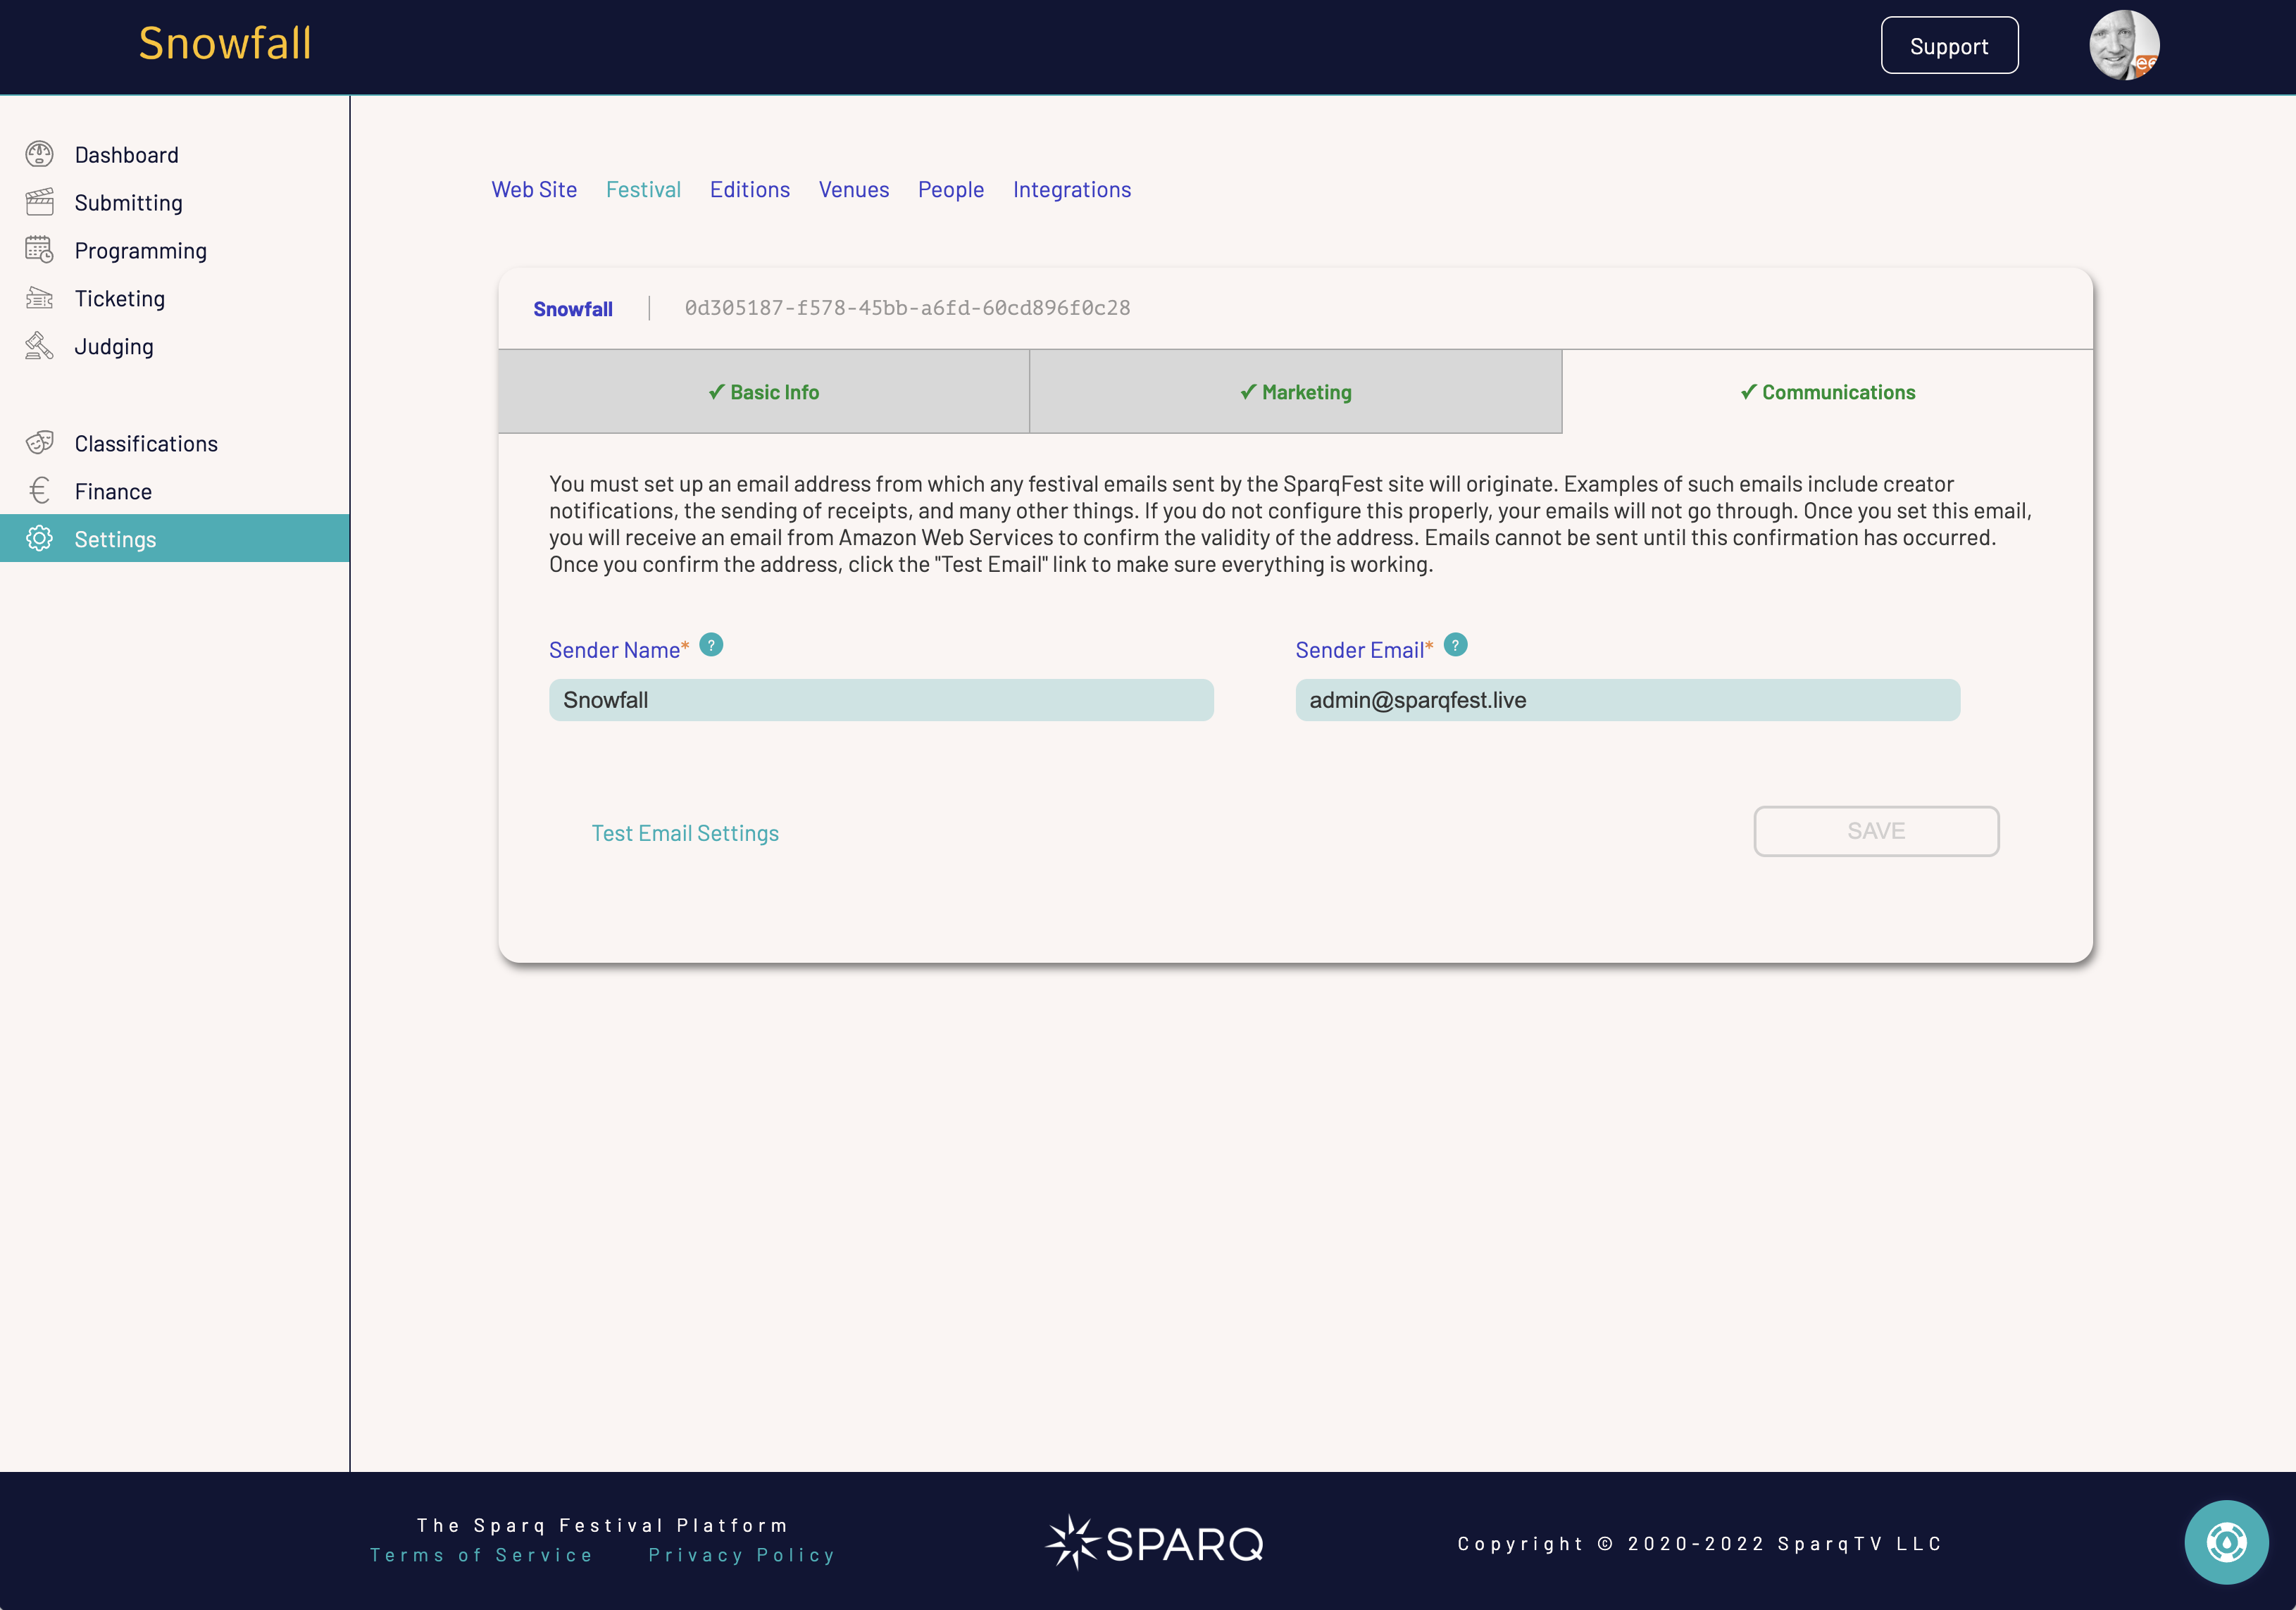
Nothing will work as you want it if your email communications are not correct.
First, check that this information is correct for your festival. The sender name can be anything, but the email address absolutely must be an email address that belongs to someone and is monitored and where someone will respond to emails. Change this value if necessary, or leave it as is if it looks good.
If you make a change, you will receive an email at that address to validate it. The email will originate from Amazon Web Services and ask you to click a link to verify. We cannot send email from SparqFest until you click that link and verify the email address. This step is required because we are using a service that will make sure your emails get through spam filters.
Whether or not you make a change, you should click the "Test Email Settings" link to test that the sending of emails from SparqFest is working. Click this link after you have verified the email if you made a change, otherwise click it right away.
You know your communications settings are working correctly once you have received the test email from SparqFest at the configured email address.
Now that we know you can send email, we can jump back to the Appearance tab.
Step 3: Customize the Appearance
Now that you have addressed communication settings, you can get into the fun part of customizing the appearance of your site. Switch back over to the Web Site subsection.
There are five aspects of customizing the site appearance:
- The basic text information describing the festival
- A "site theme"
- Your color scheme
- Artwork
- Adding custom pages and navigation
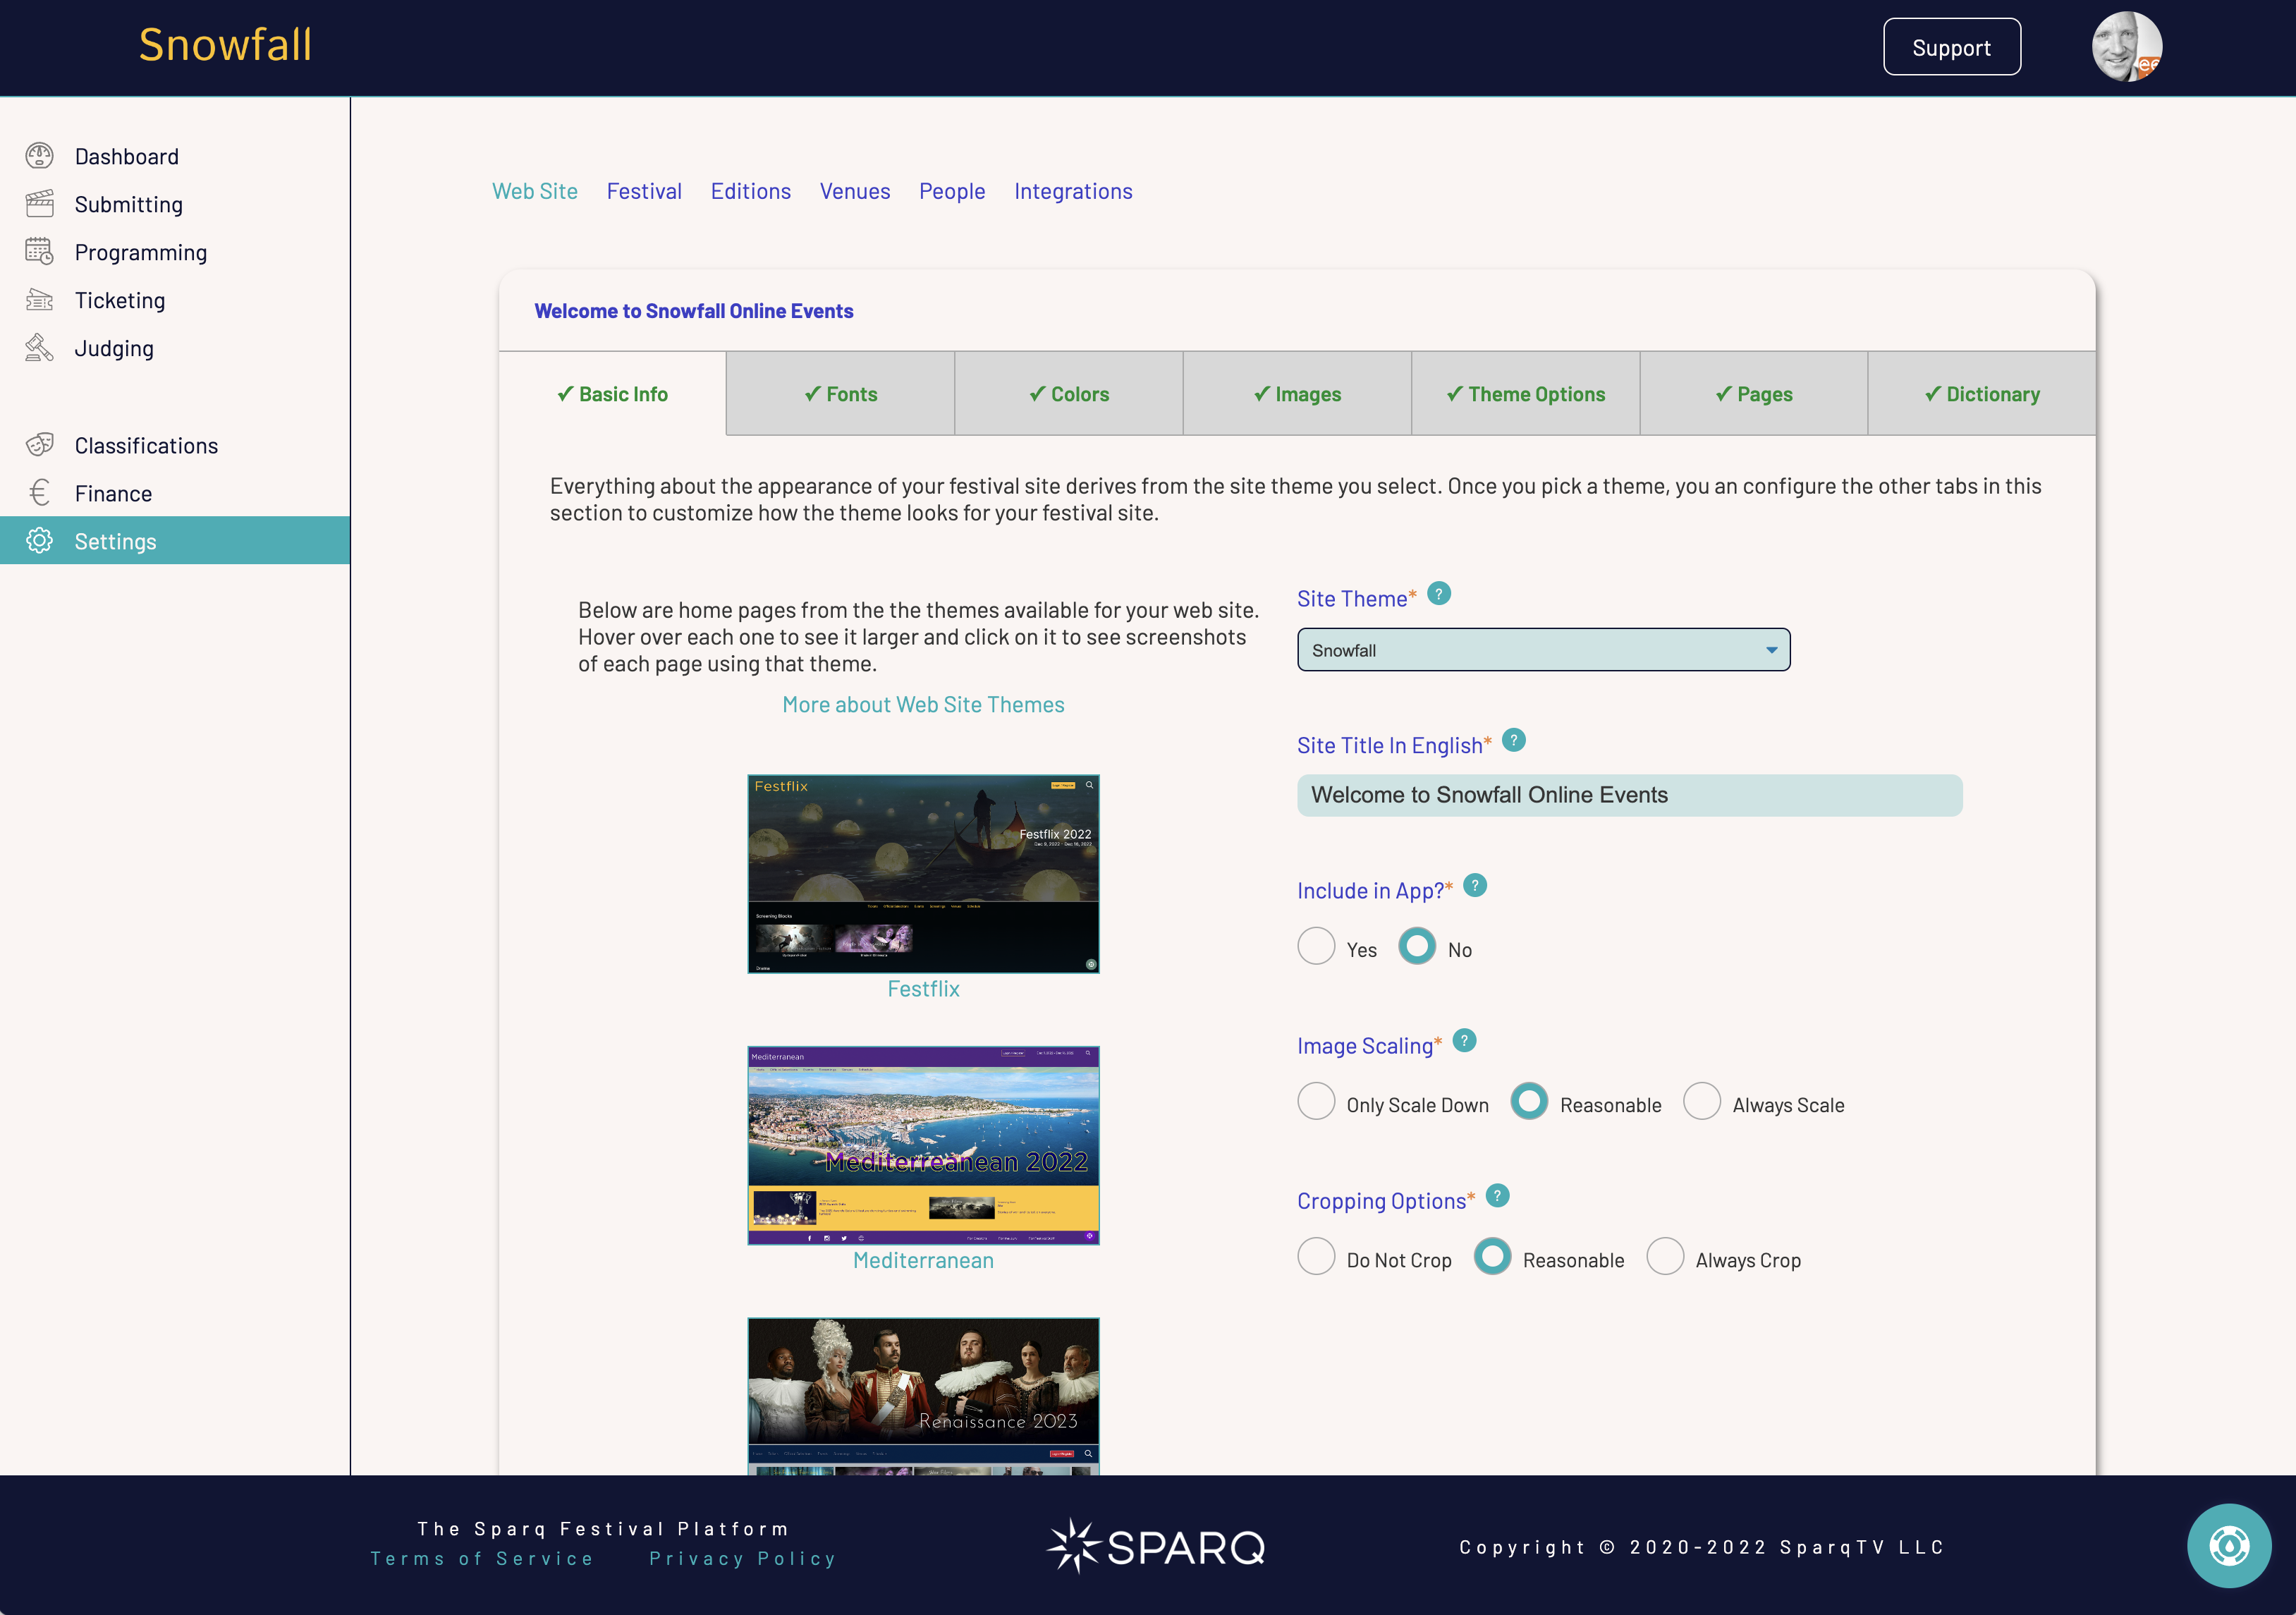
Web site settings for a sample SparqFest festival
For a more advanced discussion of site customization, check out the following articles:
The Basic Tab
The first thing you will edit will be the basic parameters governing your web site look and feel. The single most important item is selecting a site theme.
Site Themes
On the left hand side of this tab is a list of images showing what the home page for each theme looks like. The theme currently active for your site will have a border around it. Click on any theme image to get detailed information about that theme, including screenshots for every single page under the theme.
You can change the theme by selected the desired theme in the “Site Theme” dropdown.
We also have a help document on Site Themes.
Cropping and Scaling Options
One bit of customization worth calling out are the two options:
- Image scaling
- Cropping options
We collect a number of images from you and your creators. These two options govern how strict we will be when validating the images people upload. We strongly recommend sticking with the defaults.
Image Scaling
The image scaling option governs how we scale an image that is too small to look good in the contexts where we use that image. In other words, if a creator uploads a 960x540 image when we asked for a 1920x1080 image, what do we do about it?
- "Only scale down" is the strict setting. When you select it, we will reject any image of a lower quality than is being requested. We would reject the 960x540 image above in this scenario because it is a lower quality than the desired 1920x1080
- "Reasonable" means that we will scale if the image is "close enough". In other words, if it probably won't look bad, we will scale. We would reject the 960x540 image because scaling it up would certainly look bad.
- "Always scale" means we will scale up no matter how awful the resulting image will look. Thus we would scale the 960x540 image discussed above to 1920x1080 and you get what you get.
Cropping Options
But what if the uploaded image in 1950x1080? Cropping options govern how we handle images that do not match the requested aspect ratio.
- "Do Not Crop" means that the aspect ratio must match exactly. We will accept 3840x2160, but we will not accept 1950x1080 for the 16:9 aspect ratio of a 1920x1080 image. We do allow a single pixel miss in either direction.
- "Reasonable" results in SparqFest cropping the image to match the aspect ratio when we are reasonably certain we won't cut anything important out of the image. We assume a 10% safe-area in all images and crop accordingly. Nevertheless, results can sometimes be wanting.
- "Always Crop" can create frightening results, especially when combined with "Always Scale". Under "Always Crop", we will crop any image to match the target aspect ratio.
The Fonts Tab
The Fonts tab enables you to manage the fonts associated with your theme. As of the writing of this document, all themes support three font attributes:
- Serif
- Sans-serif
- Monospace
A future release will include theme-specific fonts (like a “titles” font).
For now, you can ignore this tab. When you are ready, explore the article on Colors and Layouts to learn more about customizing fonts.
The Colors Tab
As the name implies, it enables you to alter the color palette of the web site. Depending on the theme you selected, you will be prompted for different color options. The help document for each theme describes how each color is used. The article on Colors and Layouts goes into full detail on color customization.
The Images Tab
The logos and posters are the core media assets we need to make the SparqFest site really look like it belongs to your festival. We commonly ask for four media assets, though your theme may ask for additional ones:
- Festival Logo
- Dark Logo
- Favicon
- Social Media Poster
The festival logo is, of course, your logo. Once you have your colors set, you may need to experiment with a white vs color logo to see what looks best. We use your logo all over the place.
The dark logo, on the other hand, is an optional upload. We use it when we know we need a dark-color logo to go over a light background. If you do not upload one, we will convert your festival logo to black. Most times, the conversion to black is good enough.
The favicon is what appears in the browser address bars and browser tabs next to your festival name. The best way to create a favicon is to upload a transparent 32x32 PNG. This image needs to look good at very small sizes, so simply uploading a square version of your own logo may not be the best approach, depending on your logo.
The social media poster is what shows up on Facebook and other social media environments when someone shares your home page.
The Theme Options Tab
Different themes have different options you can configure that are specific to that theme. This tab asks you for those items. In particular, you will see options for highlighting certain kinds of content. Such options allow you to manage how we present selections within the system and what classifications we present. Almost every festival, for example, will want to highlight genres whereas classifications by "theme" (not to be confused with “site theme”) is used by very few festivals.
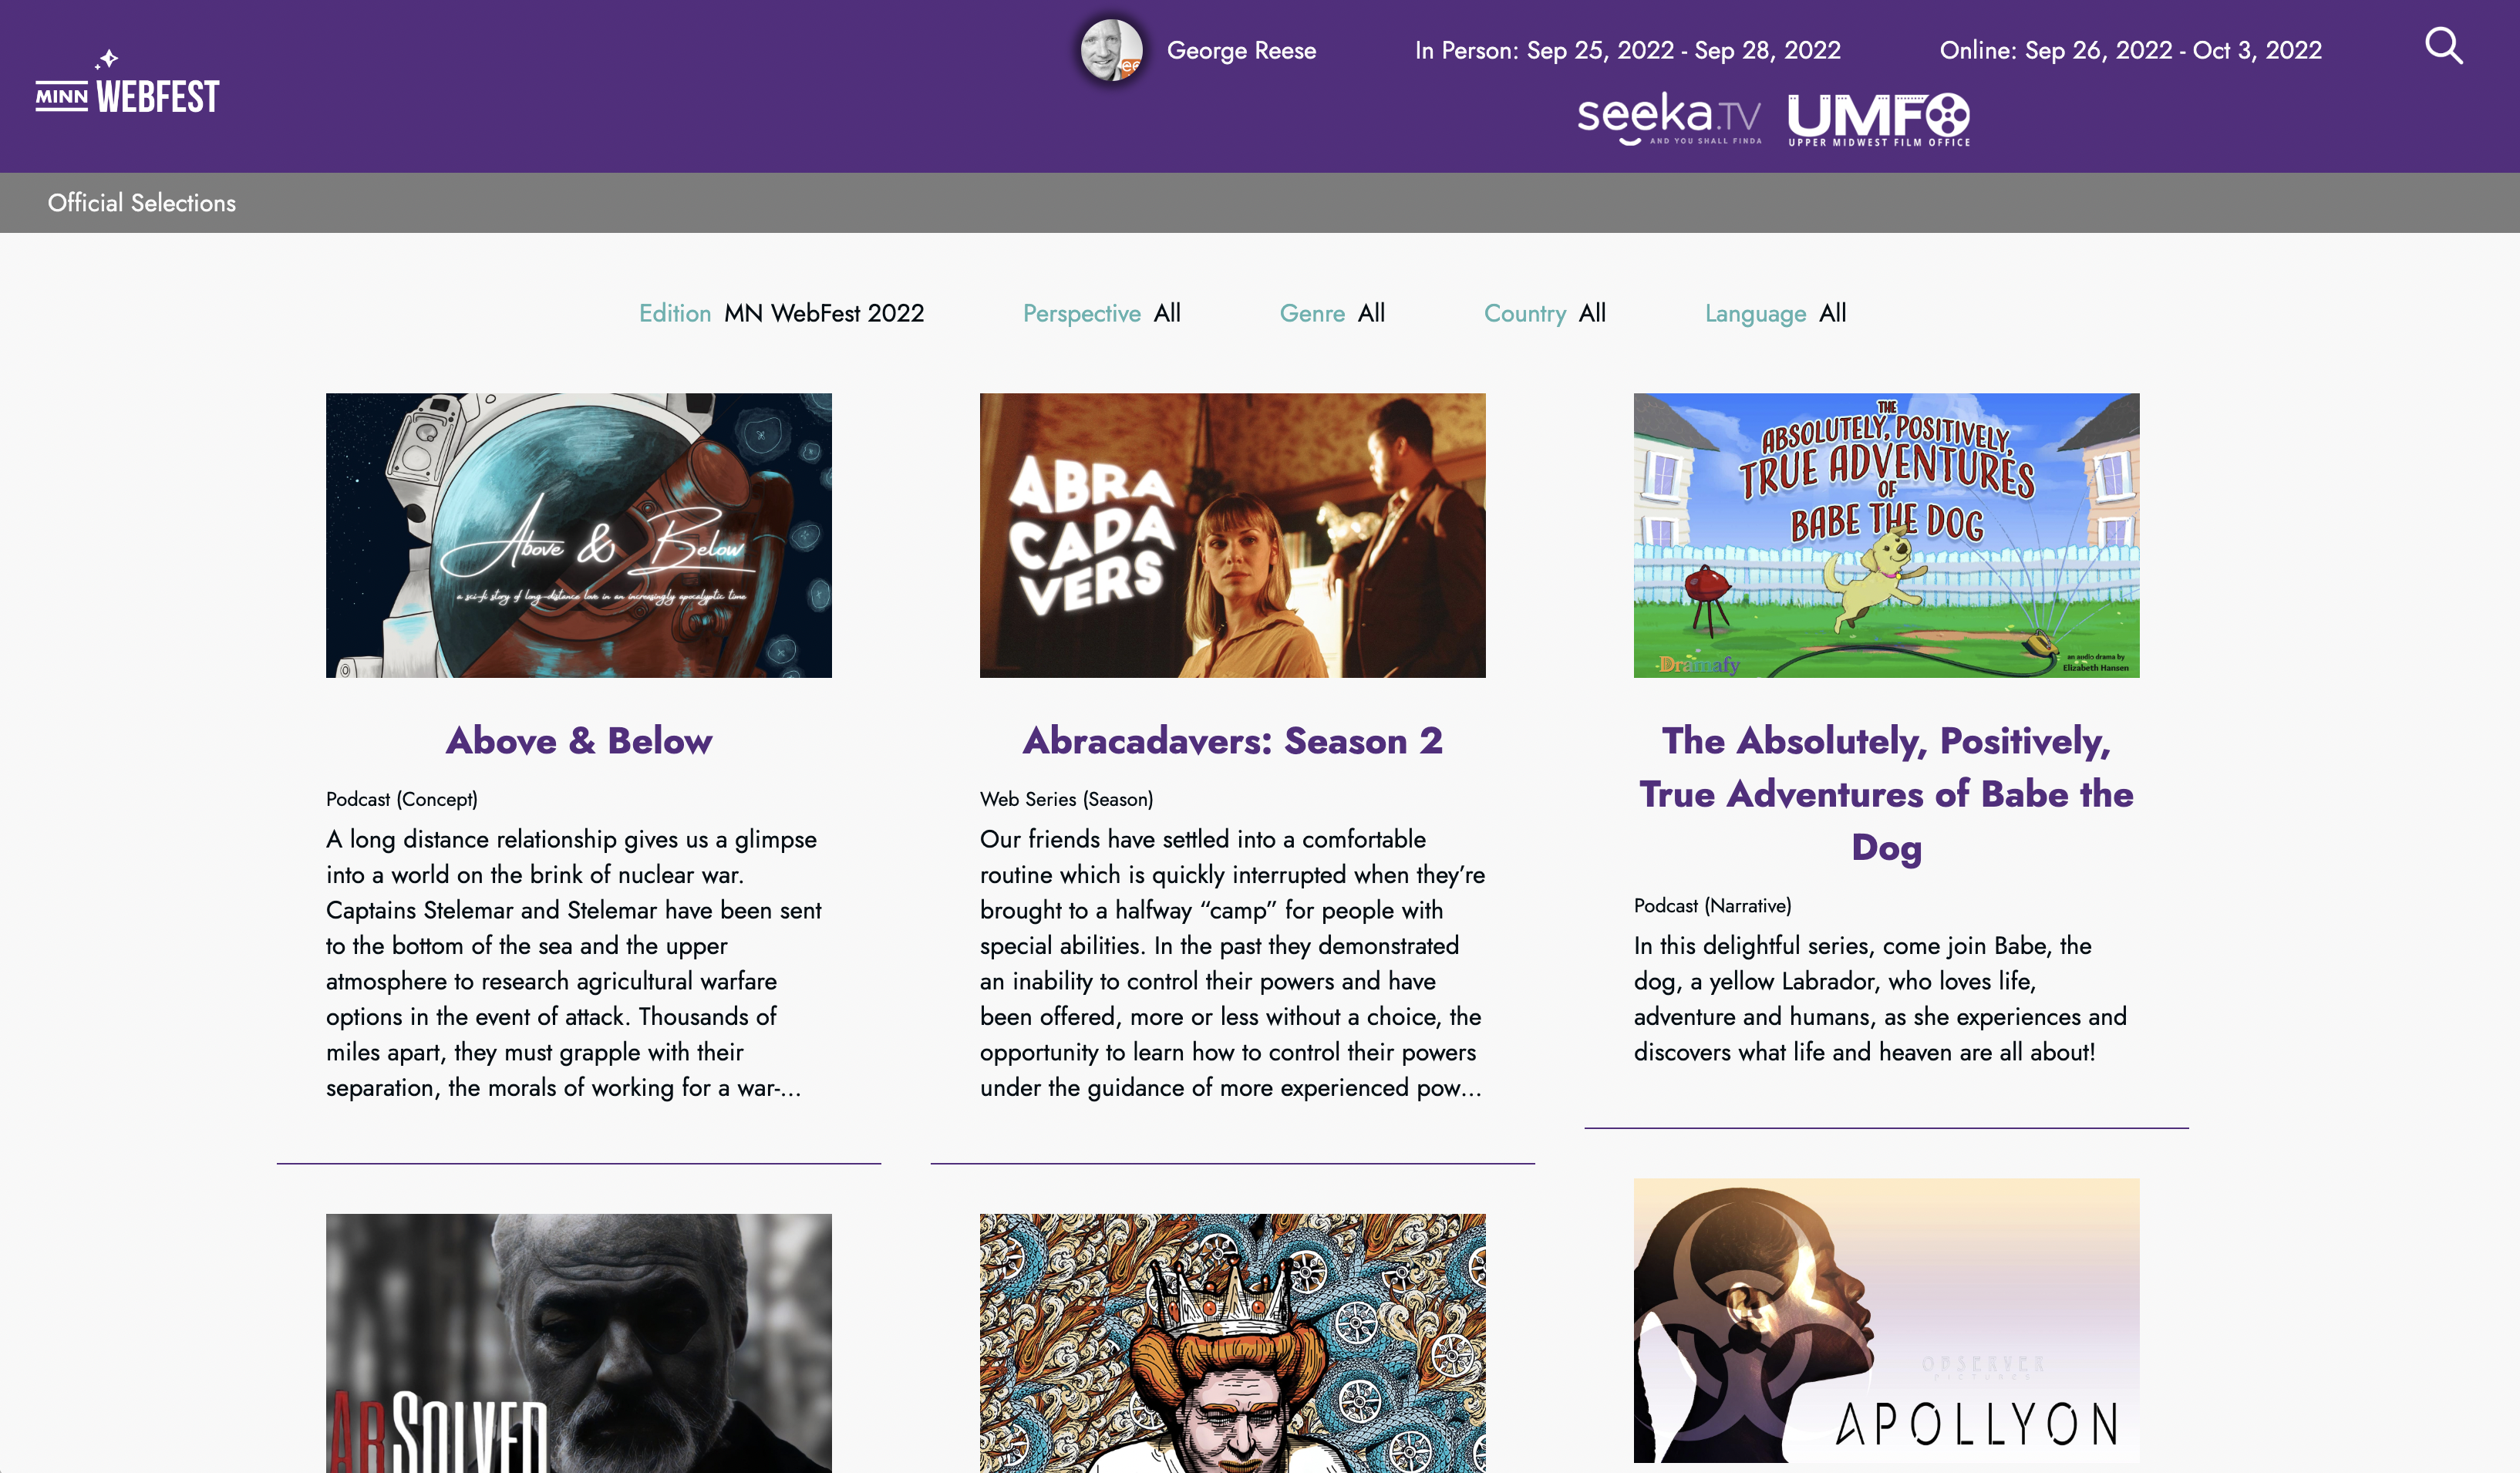
Minnesota WebFest highlights perspectives, genres, countries, and languages (but not themes).
Why would you turn any of these off?
- You are a local festival and highlighting countries and languages makes no sense
- You are festival built around a specific perspective and calling out perspectives is redundant
- You don't have the concept of themes associated with your festival
The Pages Tab
This tab includes advanced customization options aimed at festivals looking to use their SparqFest site as their main www site. For full details, see Custom Pages and Navigation.
The Dictionary Tab
The only thing you want to do on the Dictionary tab at this point is select which languages you want to support on your site.
While it might seem like a good idea to just select all supported languages, you really should limit the languages to those important to your core audience. Of course, the more languages you select, the more accessible your site is to an international audience. The trade-off is in the complexity of managing your site and selections.
Languages in SparqFest
SparqFest supports international festivals presenting content in many different languages, including content in dead languages or constructed languages. The whole issue of language support is thus very complex.
We have "site languages", "content languages", and "user languages". In the Dictionary tab, you are configuring the "site languages". The site languages govern the languages in which your SparqFest web site appears. Content languages are the languages of the selections. You do not need to configure "content languages"—creators can upload content in any language, living or dead, real or constructed. In other words, we can support a film in Klingon or Latin, but your SparqFest web site will not itself be in Klingon or Latin.
Finally, user languages are the possible languages to which a site visitor might have their browser set. Basically, user languages are the list of user languages is the list of modern spoken languages. A visitor who comes to our web site with their browser configured for UK Welsh, for example, will things like numbers, dates, and currencies formatted for the UK with dates in Welsh. Everything else will depend on the site languages configured for the site.
For a full discussion of SparqFest internationalization features, see Languages and Localization.
For an understanding of the rest of this tab, see Customizing Site Content.
Step 4: Provide Festival Social Media Links
Now that you are done configuring the site, it's time to configure information about the festival itself. You already configured the most important item, the communications settings. Go over to “Settings” > “Festival” > “Marketing”.
The Marketing tab provides us with all of the social media and other promotional information about your festival.
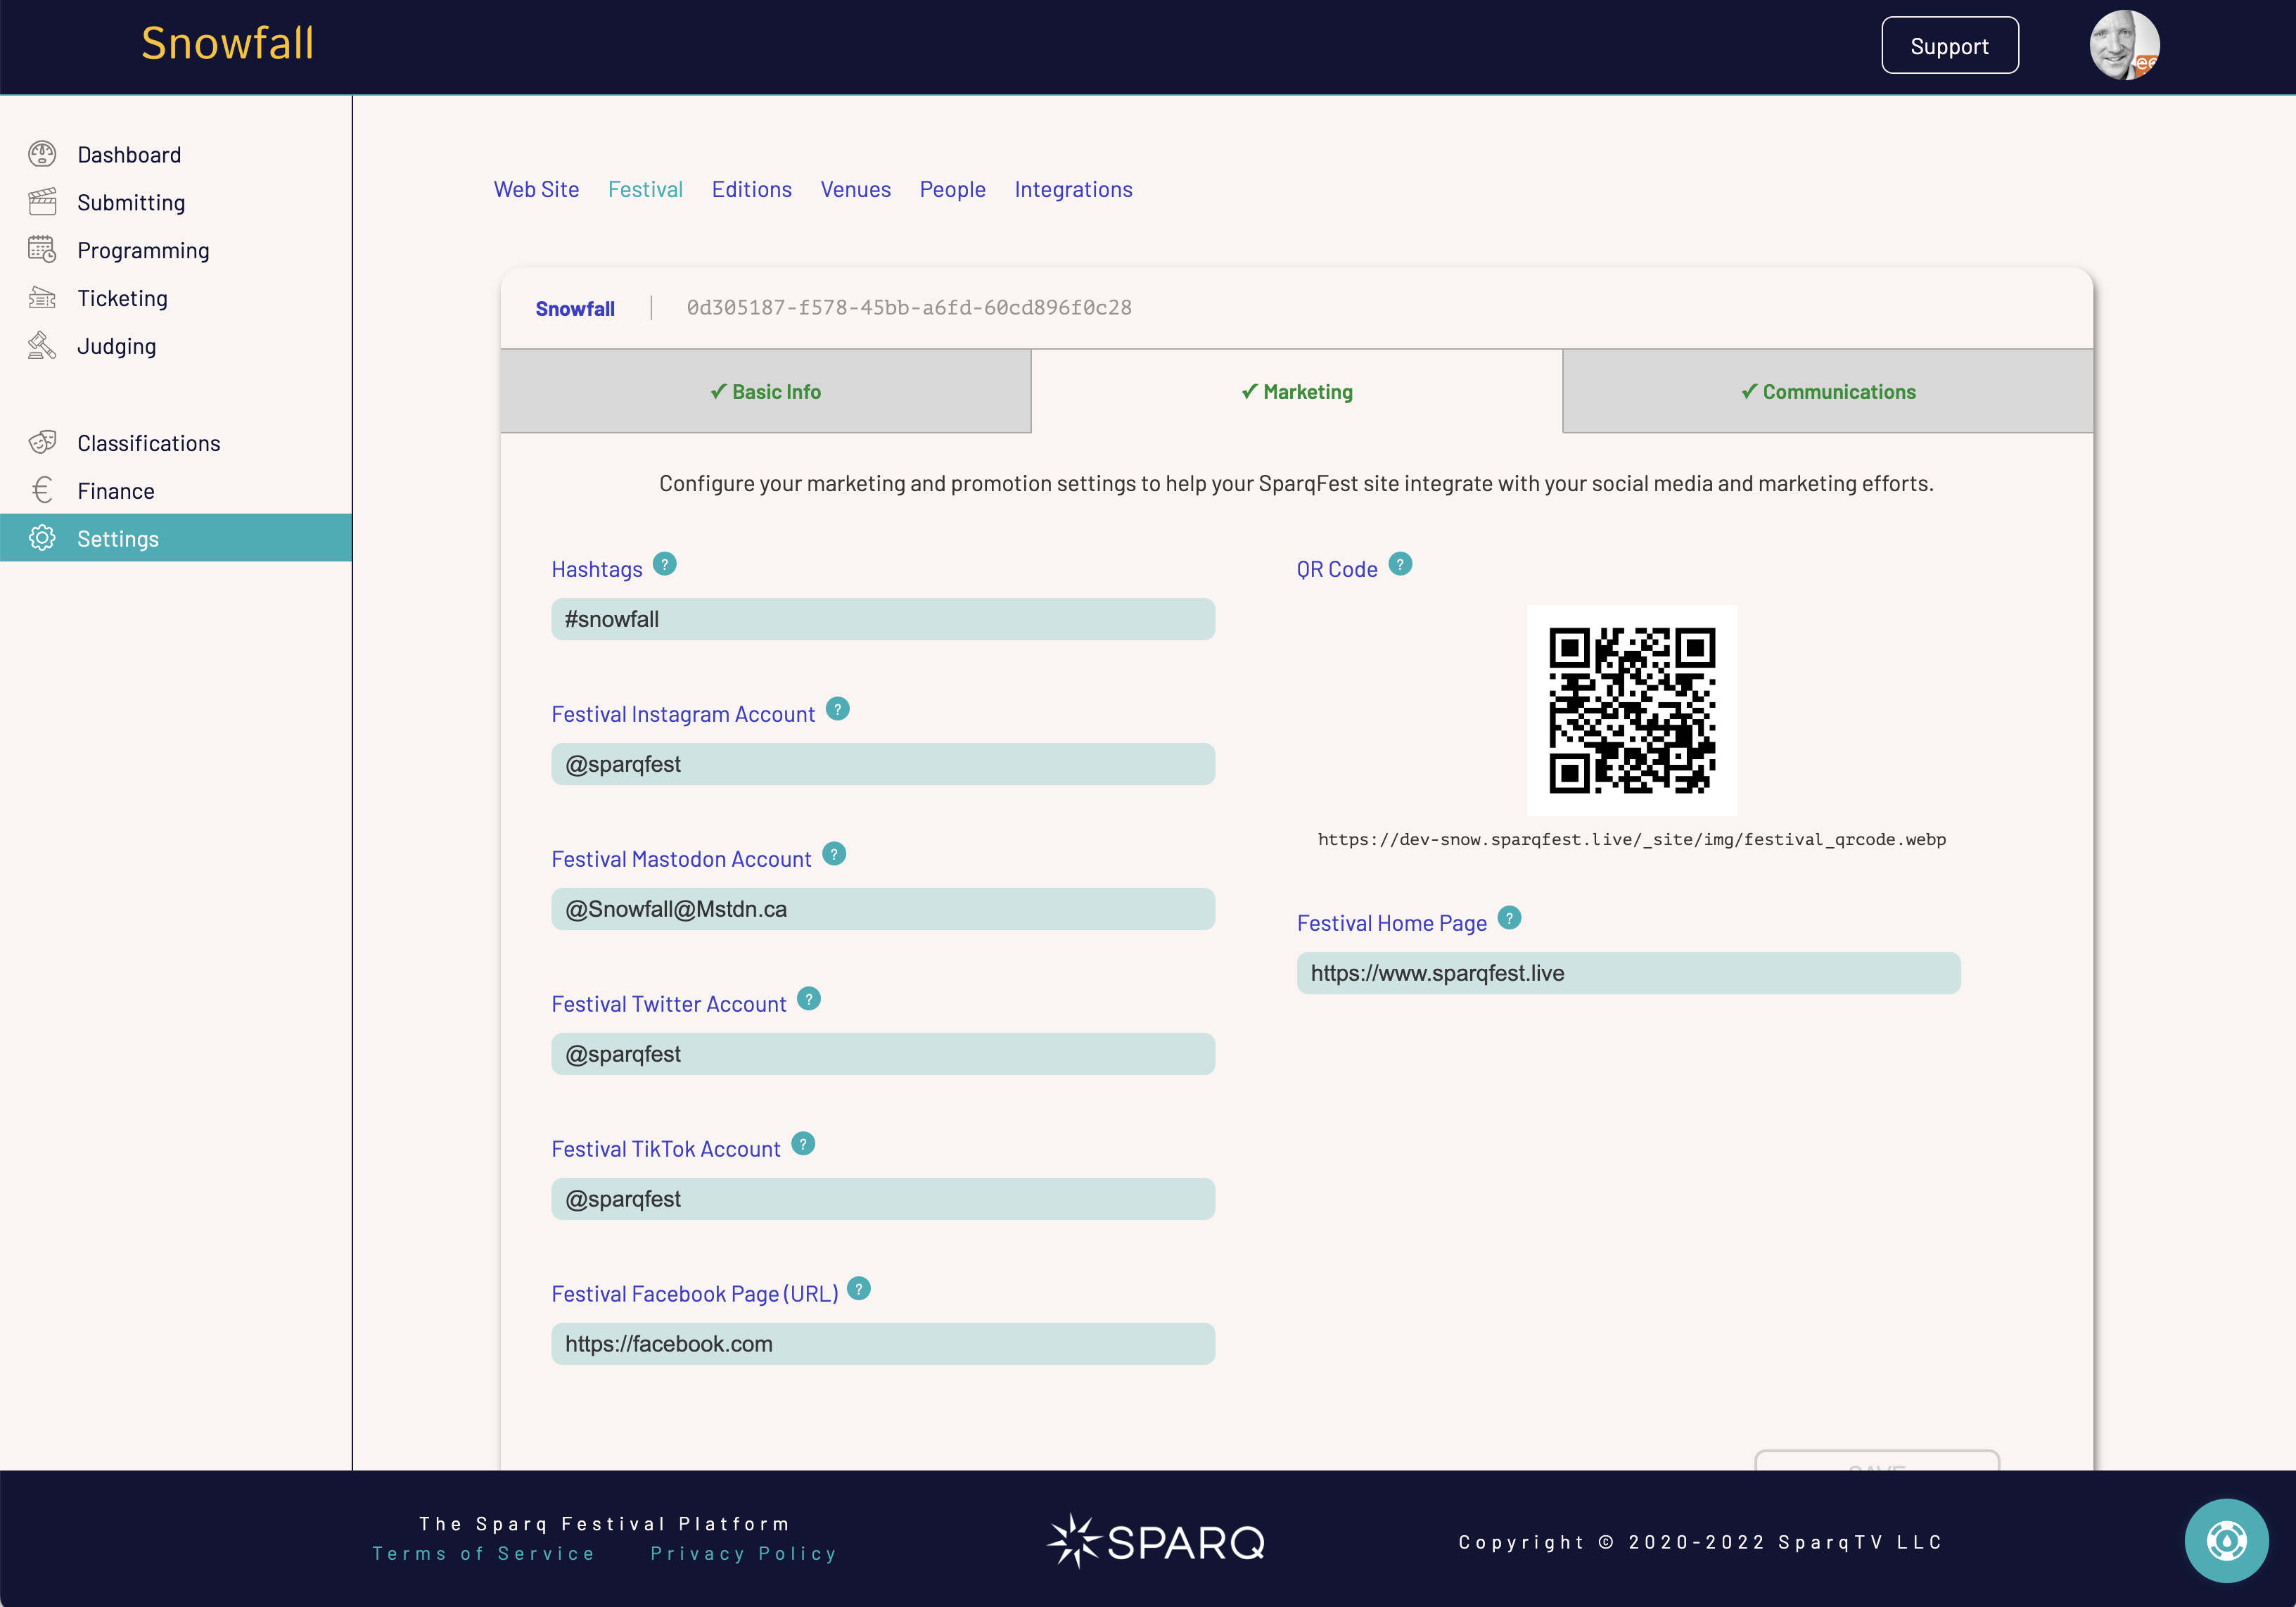
The Marketing tab governs how we manage the promotion of your social media presence
All of this information is optional and your site will show the tab as being complete without you providing any of the requested information. You should fill it out completely, however, unless you simply don't have a presence on a specific platform.
We also provide a QR code that you can use to promote the online site in print media. Note that this QR code will change if you customize your SparqFest URL.
Next Up: Edition Setup