
Note: the features in this article are new as of December 9, 2022. Our goal with this feature is to enable you to replace your www site. Please let us know if this functionality is falling short of that objective for your site needs. We will work to address those concerns in a future release.
Out of the box, SparqFest will create a dynamic web site based on your festival schedule and the data provided by the teams behind your selections. Some festivals would simply like their SparqFest site to replace their existing www site. To do this, you need to create pages of static content for things like “news” and “about us” and other things. Additionally, you might want to link to third-party tools from your main menu.
SparqFest support for custom pages and navigation is in the new “Web Site” settings of the Staff Portal. To start customizing these elements, go the “Pages” tab of the web site settings panel (“Settings” > “Web Site” > “Pages”).
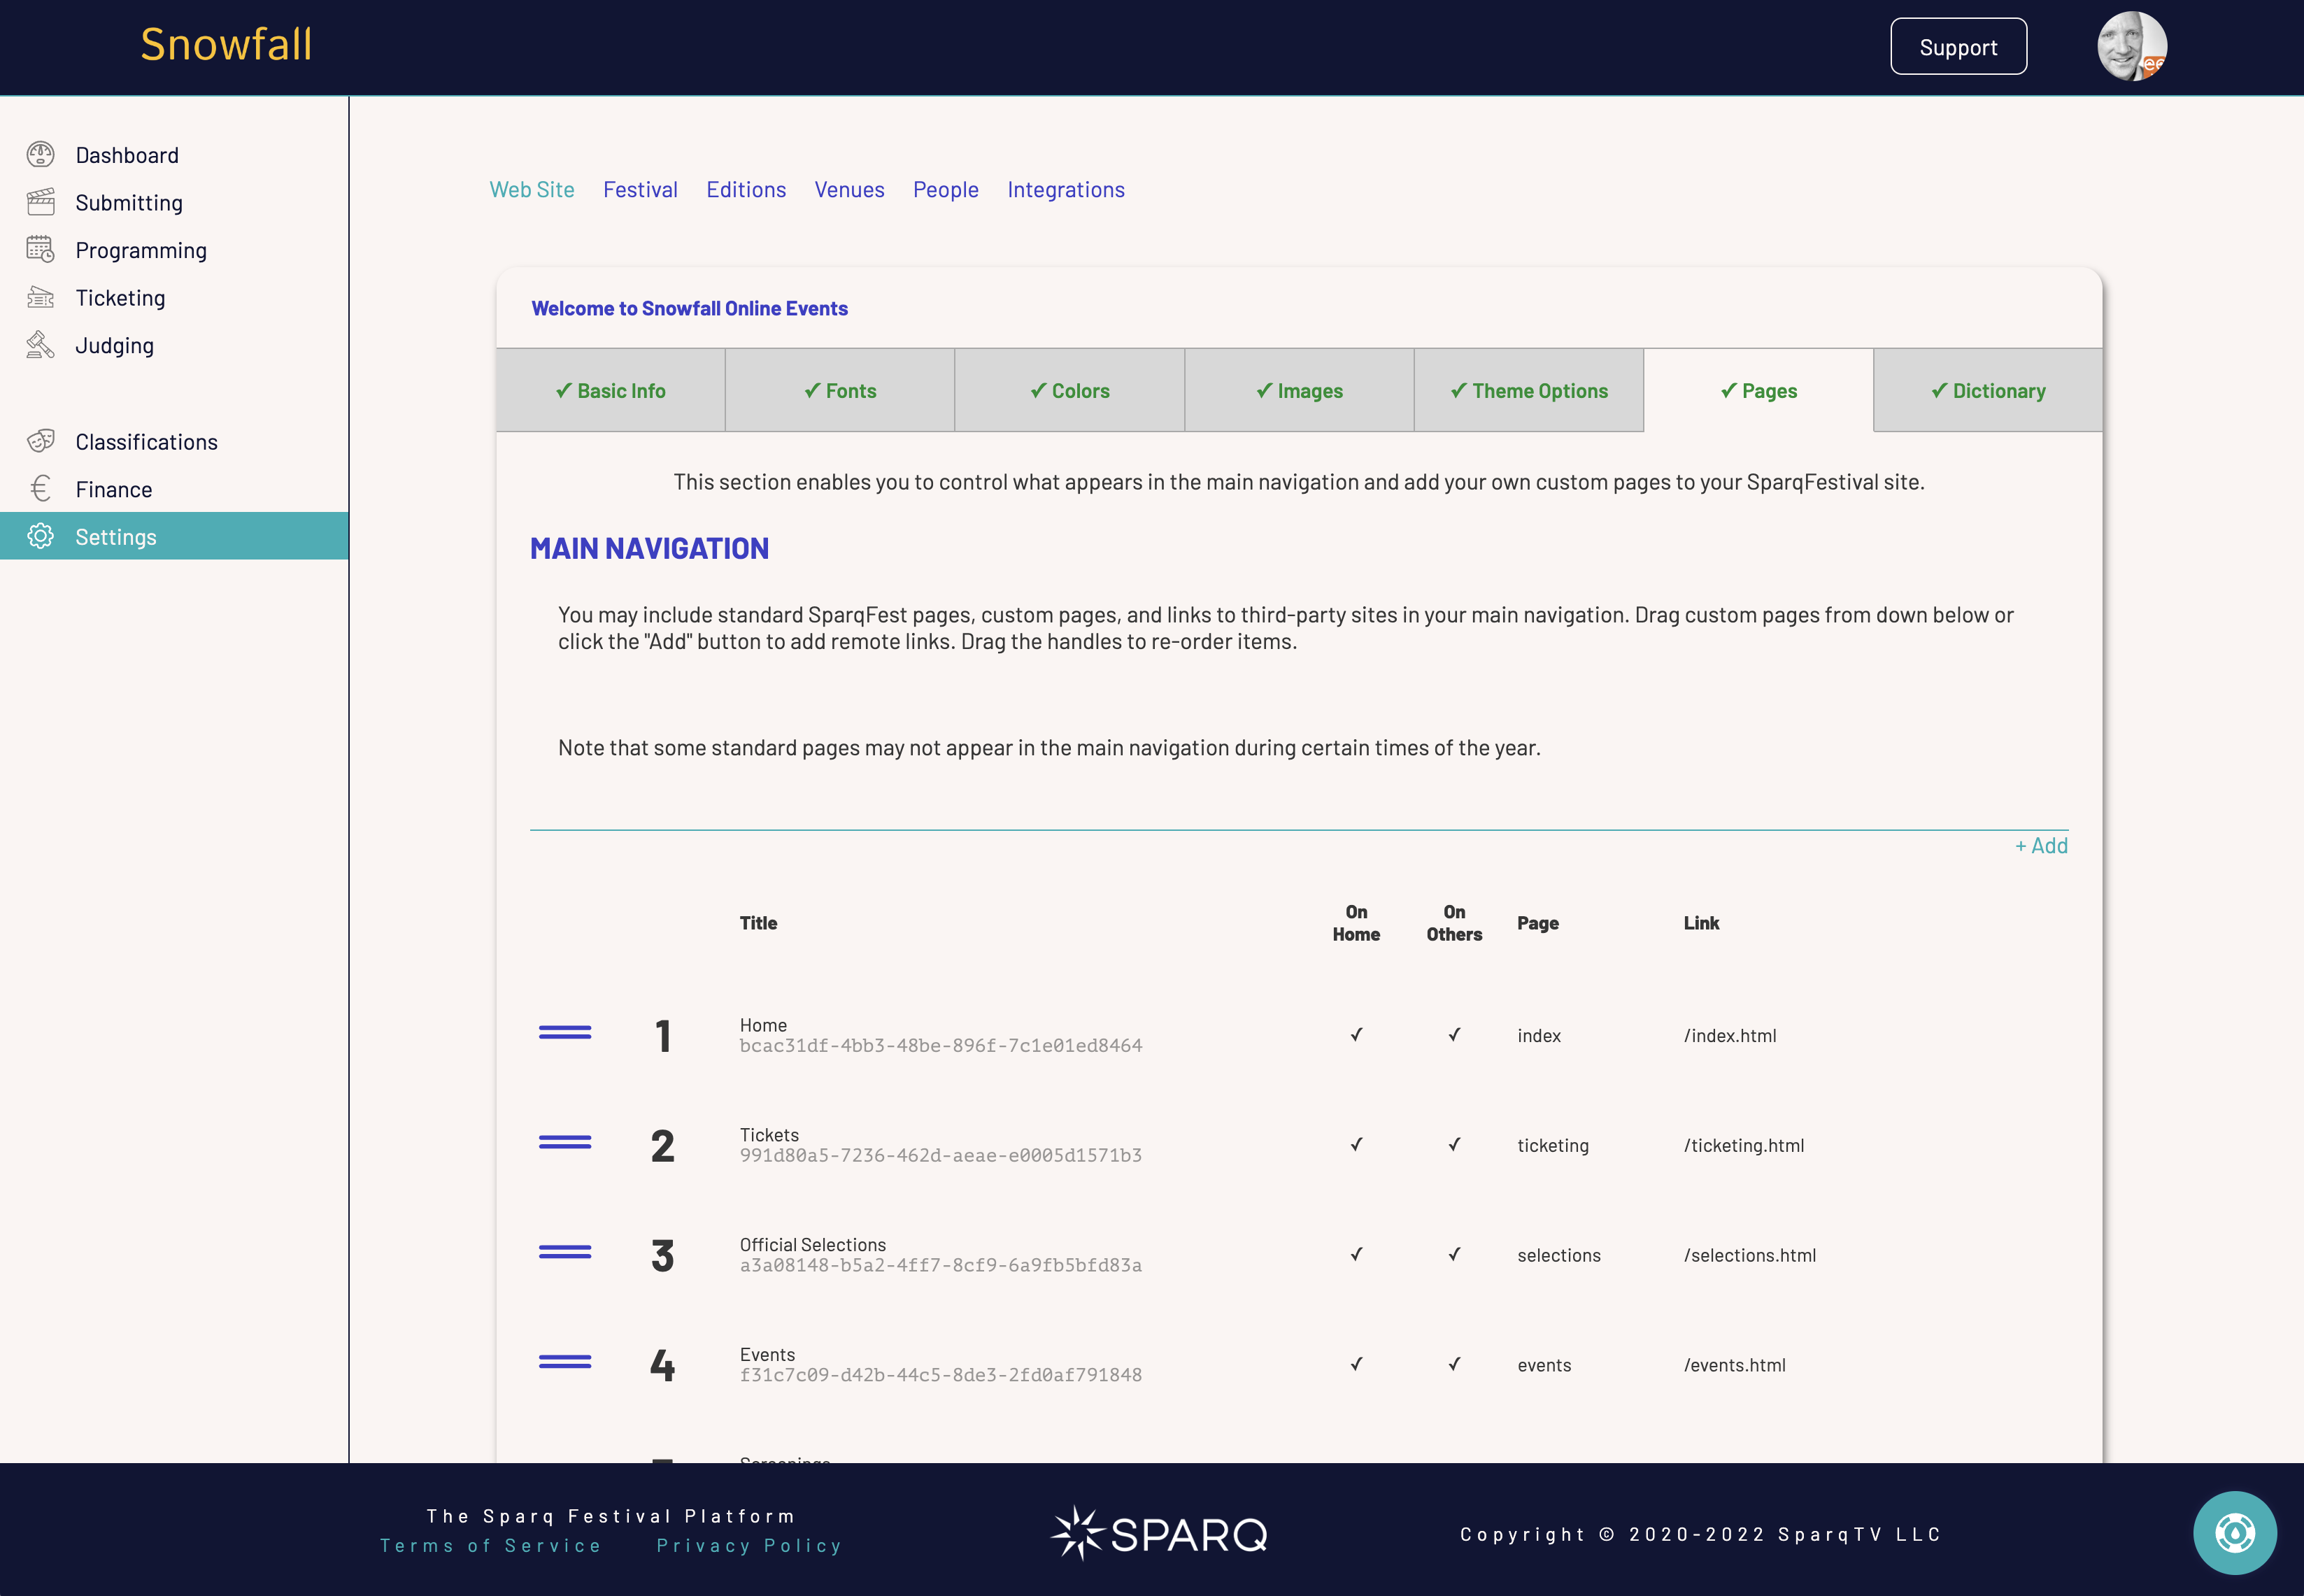
There are two parts to this tab:
- Main Navigation
- Custom Pages
The first part lists everything that might appear in your main navigation. Not all items appear at all times, however. The “Submit Your Project” link, for example, shows up only if you have configured your submission link in SparqFest and you are in your submission window.
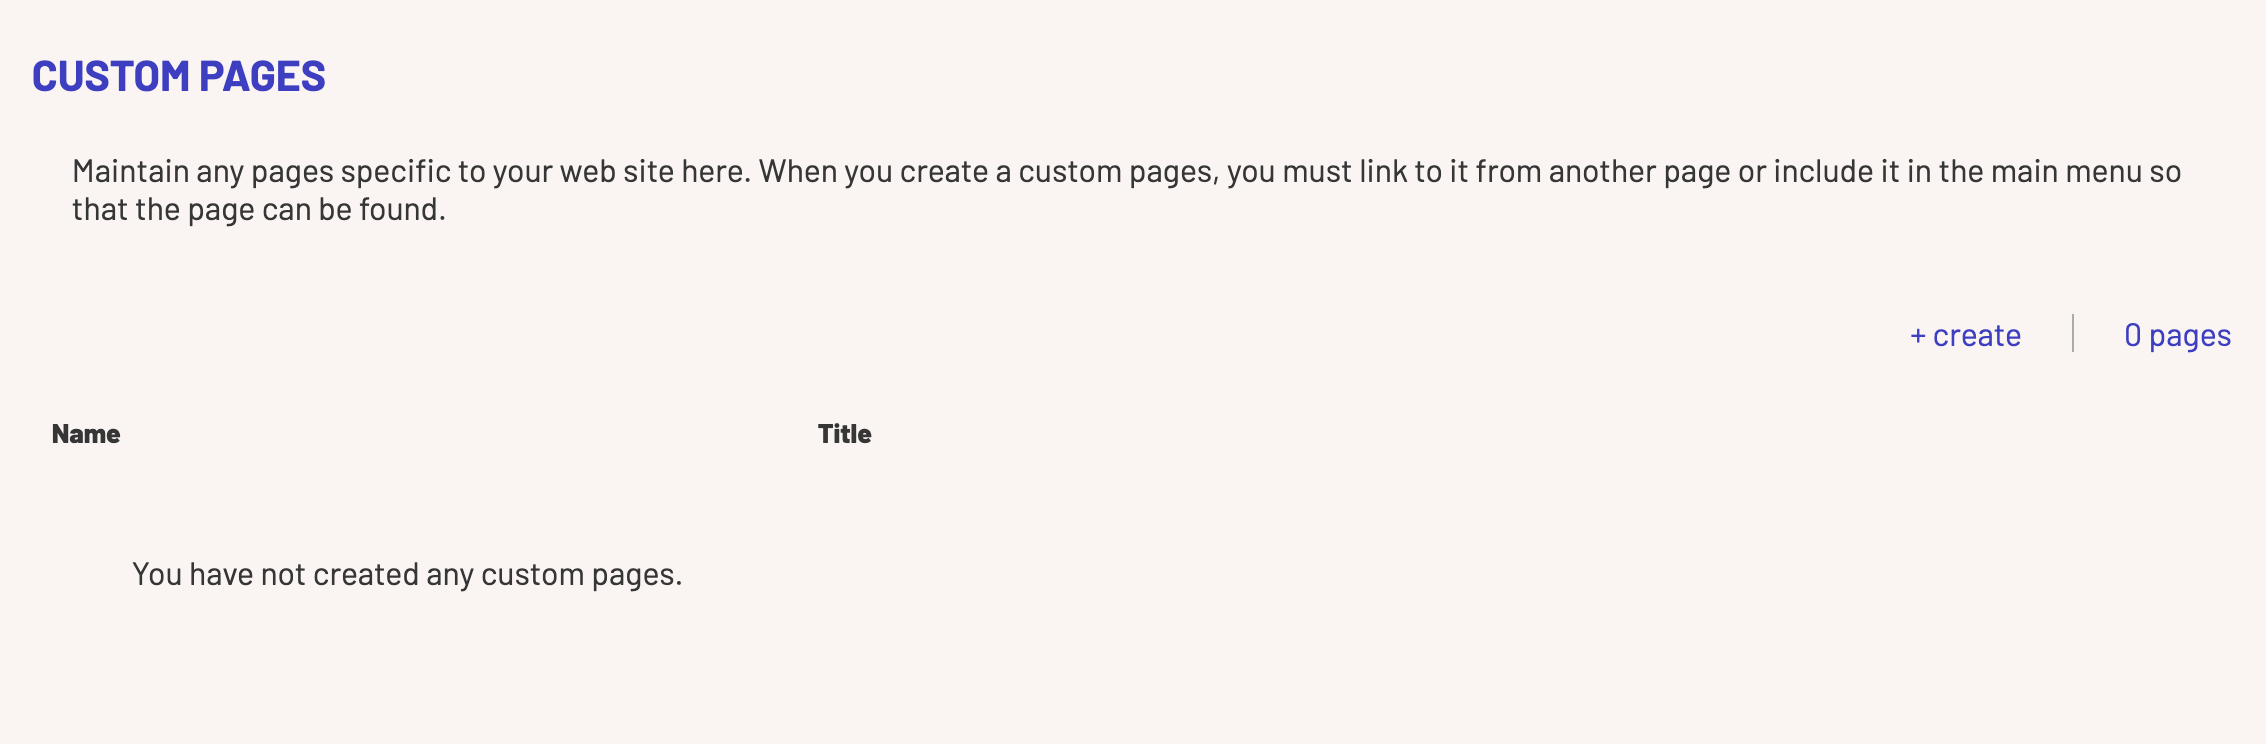
The second part will be empty with a new SparqFest installation. It's where you create and manage your custom pages.
Custom Pages
A custom page is any page that SparqFest does not generate out of the box.
Creating Pages
To create a new custom pages, click the “+ create” button.
This dialog asks only for the name of the page and a title. You will edit the content of the page in a minute.
The name should be unique, not conflict with a built-in page name, and simple. In the above example, we create an “about” page for “About Us” type content. The name of the page is fittingly “about”. People will be able to access this page at /about.html.
At this point, you have a blank page. Now it's time to fill in the page.
Editing Pages
To edit a page, just click on it in the list of pages.
The page that results will fit into the larger theme you have selected for the site with headings and content formatted in a manner matching the rest of your site.
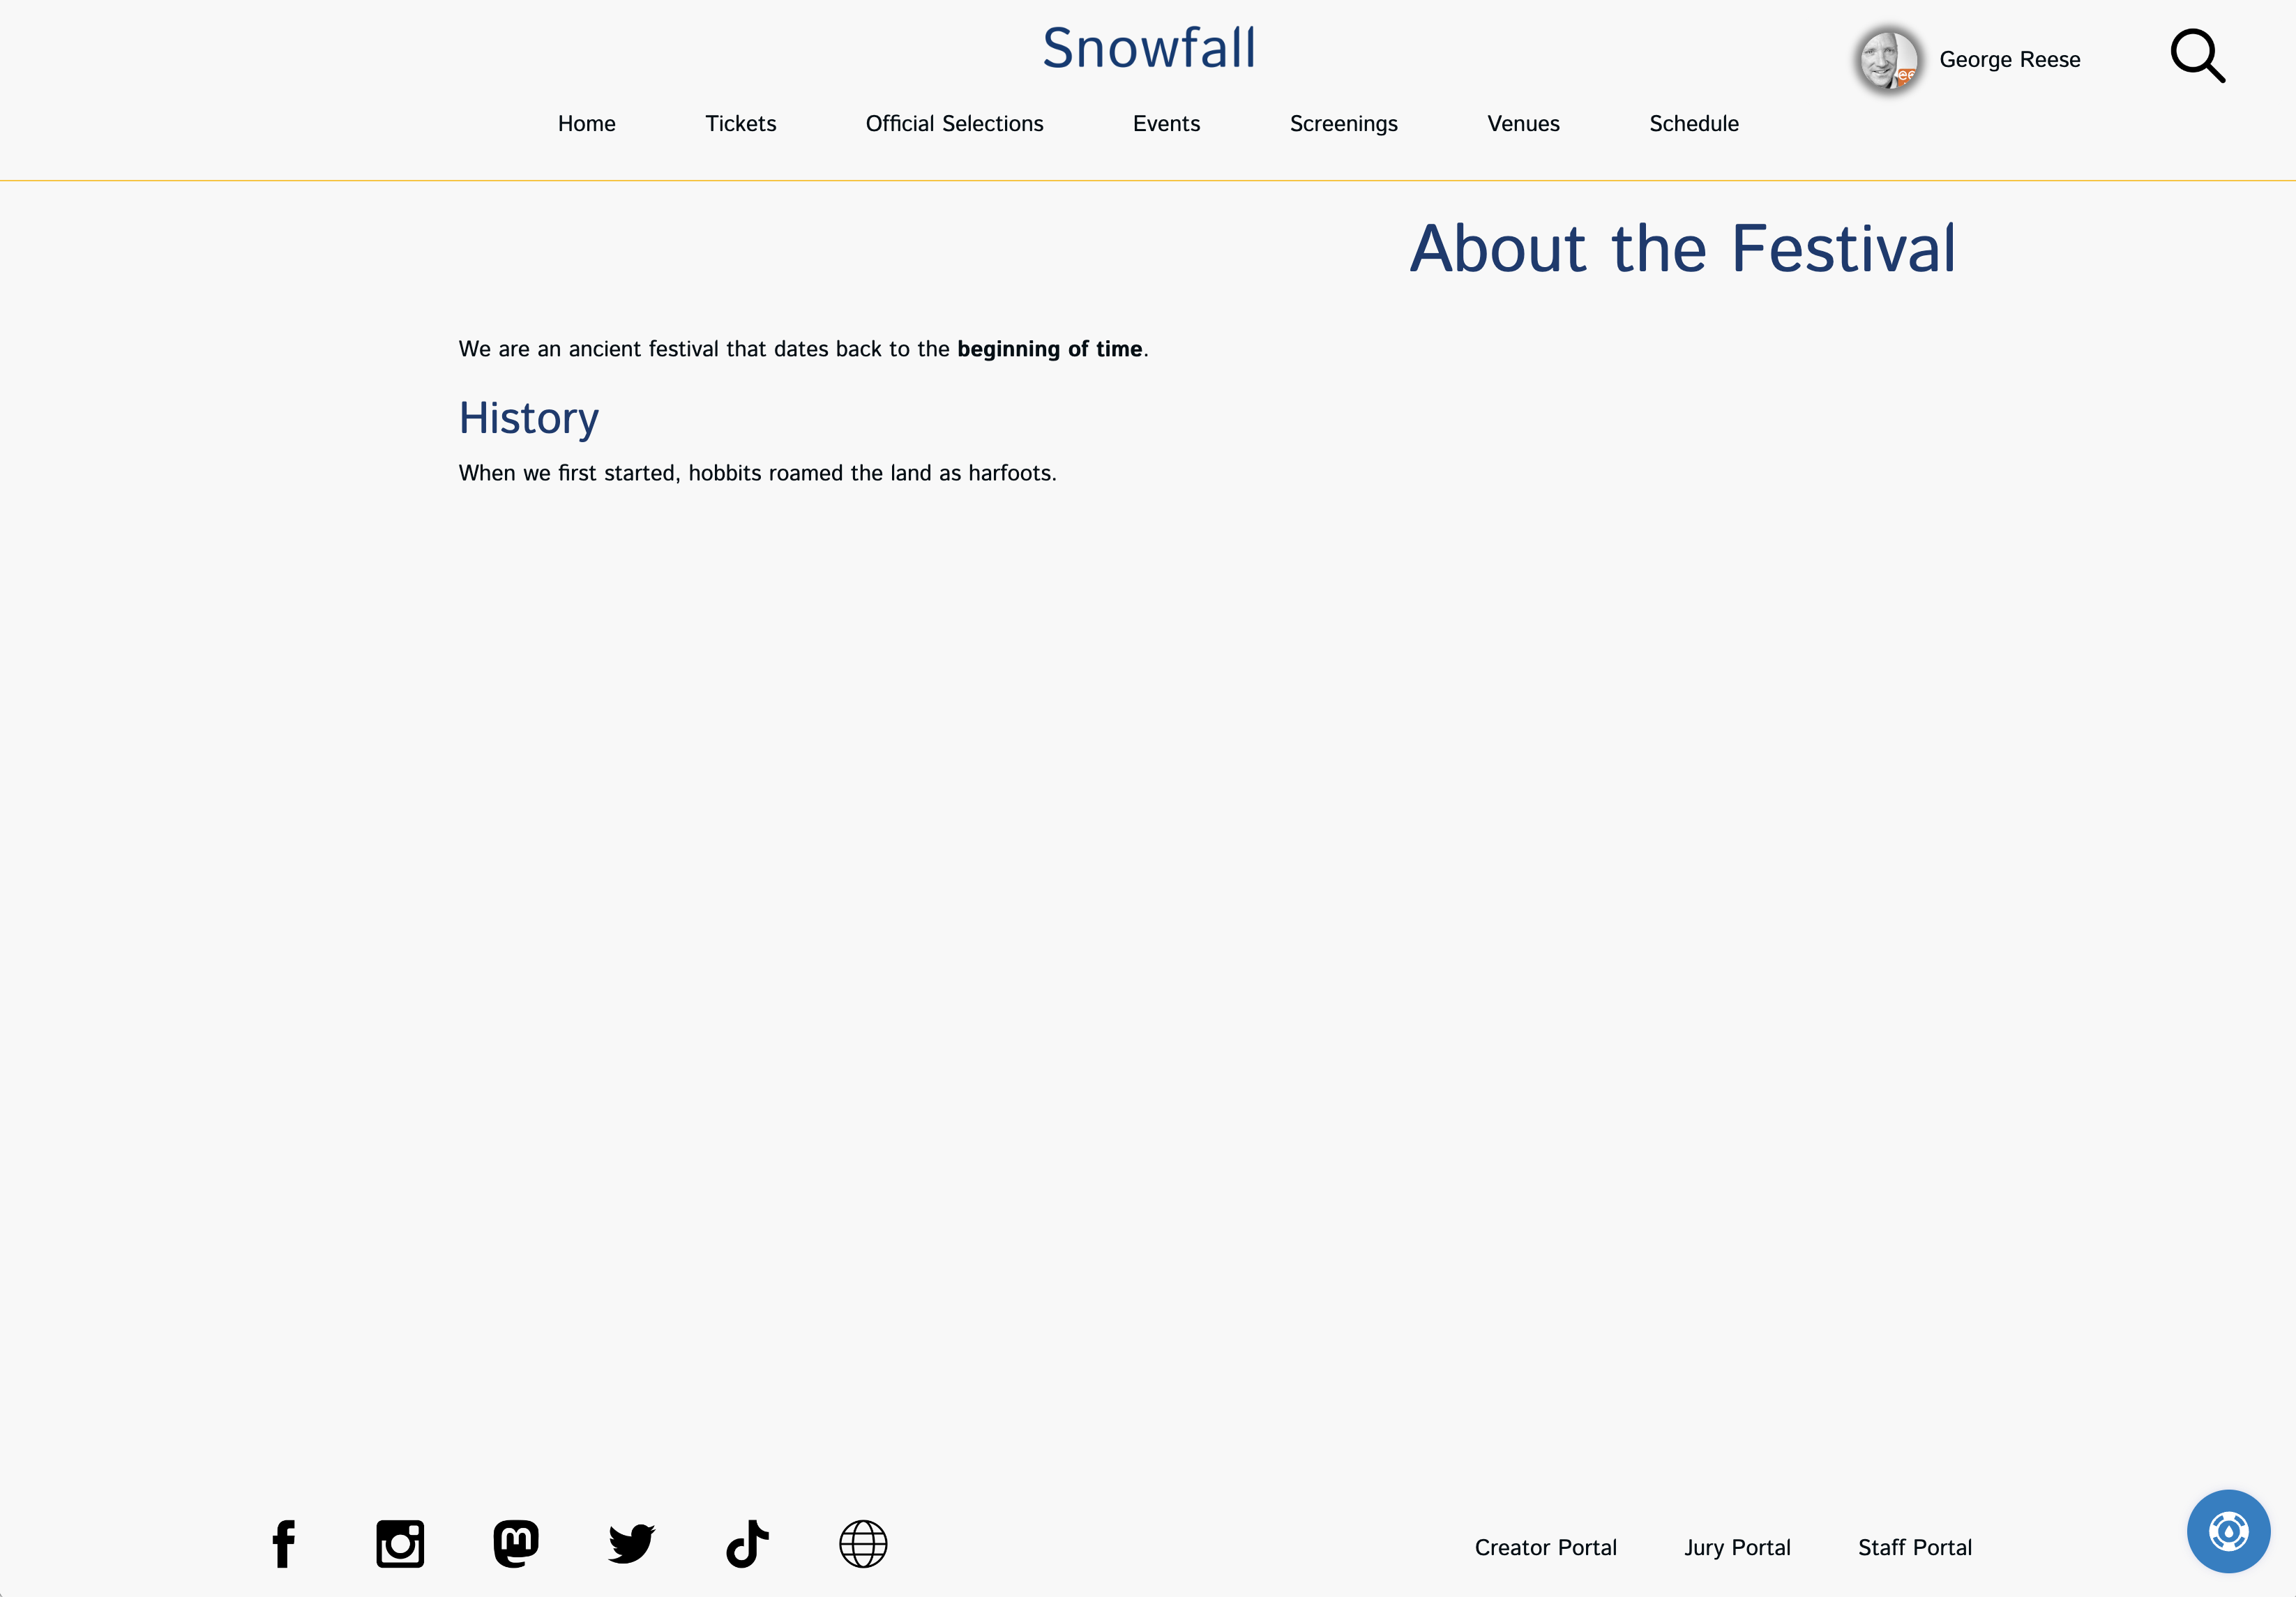
In the Snowfall theme example shown above, you can see that the content we entered looks just like any other Snowfall page.
The editor we currently use is called TinyMCE. It's much more powerful than simply typing basic text. Among the things you can do:
- Different block styles, including paragraphs, bold, italics, bullets, and numbered lists
- Tables, emojis, special characters
- Images and embedded videos
- Select colors from your color palette
- Change between fonts you have configured for your site
- Bi-directional text
Images
For images, you can either link to an image hosted elsewhere or upload an image from the menu bar. When in the editor, click the image icon and it will prompt you for information about the image to be inserted. If the image is hosted elsewhere, enter the URL for the image. Otherwise, select “Upload” and upload your image. Once the image has been processed, it will show the height and width of the image. You can change that value to make the image smaller if it is too big. You should never make images bigger, as they will not look good.
Before saving the image, you can also pick class options to govern the roundness of the image corners and how big of a border you want around the image.
Another tool for formatting images is in the main editor menu after you have inserted the image. Select the image in the editor and then go to “Formatting” | “Formats” to select from “Image Right” or “Image Left”. This will make adjacent content appear next to the image rather than after it.
If you have more complex layout needs, you may want to use tables.
Video
To protect the intellectual property of your creators, you should never post selection screeners to your own custom pages. Instead, the videos in your custom pages should be promotional videos, short clips, and other supplemental content. We strongly recommend using a Vimeo account for this purpose.
Once you have uploaded your video to Vimeo, click the Video icon in the editor in SparqFest to embed the video in your page. In the popup, enter the Vimeo URL to share it.
Why Vimeo?
Though we have a very robust streaming engine in SparqFest, you are paying for the content hours for your festival. Vimeo is better suited for general promotional videos that you may want to embed in many places.
Content Translation
Content translation works differently here than it does in other parts of the Staff Portal. In this editor, you work with one language at a time. Whenever you edit content in the primary language for your site, you are presented with the option to re-translate for the other languages (not shown in the single-language example above). If you choose to re-translate, then the system will use machine translation to generate new translations for all other languages.
To manually manage the translation of the page for a specific language, select that language on the left. You will need to save your changes before moving to the next language.
Page Access
After you create, edit, or delete any page, your SparqFest site will begin rebuilding. After several minutes (how long depends on the size of your site), you can access the page by going to https://[yourfestival].sparqfest.live/about.html.
You can use this link to link to the page remotely or within other pages you create. It's also possible to add the newly created page to the main site navigation. We'll discuss that in the next section.
URLs for SparqFest Pages
If you go to the URL mentioned above, you will be immediately re-directed to another page at /en/about.html or /fr/about.html or whatever is appropriate for the language in your personal profile settings. Each custom page (in fact, most SparqFest pages) have multiple URLs.
The main URL is what is called the “canonical URL”. In the above example, it is /about.html. It's the URL you give out in print, share in emails, use in other sites, and post in social media.
The other URLs are language-specific URLs: /[language_code]/about.html. Anyone who visits the wrong language URL will be redirected to the proper language URL for their settings. That redirect also happens with the canonical URL. Though it won't break anything, you should not give out our link to the language specific URLs. Linking to the site via language-specific URLs reduces the value of SparqFest search engine optimization efforts and can thus result in lower search rankings for your site.
Even if the other site is French, it is best to link to the canonical URL rather than the French URL.
Custom Navigation
At this point, the only way for an attendee to find your newly created “About” page is for you to tell them what the link is. More than likely, you want it to appear in the main menu of the web site.
Standard Navigation Links
You have full control over what appears in the main menu. By default, SparqFest places 9 different items in the main navigation, though it's uncommon for all of them to be showing on the site at the same time.
As noted earlier, standard navigation items in SparqFest show up only when it makes sense for them to show up:
- Home is always there and links back to the public site home page
- Tickets shows up only if there are tickets for sale
- Official Selections shows up unless there are no editions publicizing selections
- Events shows up only when the active edition has events to promote
- Screenings shows up only when the active edition has screenings to promote
- Venues shows up only when there are in-person events or screenings for the active edition
- Merchandise shows up only if you have configured a merchandise URL and your store is set as active
- Schedule shows up only if you have events or screenings being promoted for the active edition
- The Submission link shows up only if you have configured your submission URL and dates and you are currently in your festival submission period
You can customize these standard links in the following ways:
- You can change the link text so that different wording shows in the navigation
- You can change which ones appear on the home vs interior pages
- Changed the order in which items appear in the navigation
- You can completely remove an item from navigation
Link Text
To change the link text, click on the navigation item you want to change. This will bring up the details dialog. Edit the text and save.
In the above example, we change the link to the “Official Selections” page to “Films”. This changes impacts only the text that appears in the navigation--it does not change the title of the page itself.
Home vs Interior Pages
Before introducing this feature, one of the most requested items was the ability to add a link back to the home from interior pages. Though we've always provided a link back via the festival logo, some festivals have wanted a more explicit link. Other festivals, however, don't want such a link. Still other festivals want it on interior pages, but not the home page.
Our navigation customization gets SparqFest out of the business of having an opinion on this matter. The default navigation comes with a link back to the home page that appears on both the home page and interior pages. If you don't want the link, you can remove it altogether. If you would prefer it to appear only on interior pages, you can de-select the “Visible on Home Page” option and save.
Really, What Does SparqFest Think?
It's always good to have a link back to the home page, but it's also good to limit the number of navigation items to no more than 7 visible at any time. All else being equal, we recommend the home page link be visible on all pages for consistency. If, however, you have too many navigational elements or simply don't like “Home” on the home page, the “Home” link is a good candidate to get the axe.
Re-ordering Navigation Items
The order you see on this screen is the order in which the navigation elements will appear on your site. You can change the order, however, by dragging a specific item and moving it up or down the list. Once you have everything in the right order, click the “Save” button to make the changes permanent.
Removing Links
If you simply don't want something appearing in the main navigation, you can delete it by selecting the link and clicking “Remove from Navigation”. The list will indicate that a deletion is pending. You must “Save” to make the deletion permanent.
Removing the link will keep it out of the main navigation, but it does not remove the page. The page will continue to be generated every time the site is built. It simply will not appear in the navigation.
If you remove a standard navigation item and want to add it back later, follow the instructions for adding links later in this article.
Custom Navigation Links
With custom navigation links, you can link to the custom pages you have built or pages on external web sites.
Linking to a Custom Page
Linking to a page is very simply. Drag it from the list of pages up to the place in the navigation where you want it to appear. Click the “Save” button to make the addition permanent.
By default, the link text for the new link is the title of the page to which you are linking. If you have a page with a particularly wordy title, you can of course edit this link as you would any other to change the link text.
Linking to a Remote URL
There are two built-in “pages” that link to remote URLs: _merchandise and _submit. You may add your own remote URL links to the main navigation by clicking the “+ create” button.
You specify the remote URL and the link text and then save. The new link is staged and appears at the end of the list of navigation items. You can then move it wherever you link. You must, however, click the “Save” button to make your addition permanent.
Re-Linking to a Standard Page
If you deleted a link to a standard page and later change your mind, all is not lost. You can simply re-add it through the same process as linking to remote URLs. Instead of a link, however, you specify the name of a standard page. The following are our standard pages to which you can link:
- index - the home page
- ticketing - the ticketing page
- selections - the official selections page
- events - the list of festival events (non-screening)
- screenings - the list of screening events
- venues - the list of festival venues for the active edition
- _merchandise - the link to your external merchandise site
- schedule - the schedule of the festival calendar
- _submit - the link to your submissions platform